Anvil Tools
A useful cutout keeps the details that identify the subject and works on the background where you will actually use it. A preview on white can hide a pale halo, missing texture, or a transparent patch. Treat automatic removal as the first pass, then inspect the downloaded PNG at its intended size.
This guide follows a small product-image workflow using Background Remover. It also explains when portraits, reflective products, and transparent materials need a more capable editor. Keep the source photograph: the browser tool offers automatic removal and PNG export, without brushes, editable masks, or a layer history.
Choose a source that gives the tool a fair chance
Start with a sharp photograph containing one clear subject. Leave space around the edges so the product, hair, or handle is not already cropped. Use even lighting and a background that differs from the subject. A white item against a white wall can be difficult because there is little visual information separating them. A cleaner source often saves more time than repeatedly processing a difficult one.
Compare the source with the final placement before editing. A small catalog thumbnail needs enough detail to recognize the product; a banner may expose defects that disappear at thumbnail size. Keep a larger original and make a working copy at a reasonable resolution. Enlarging a small photograph after removal cannot restore detail that was absent from the source.
| Source or goal | Starting approach | Main check |
|---|---|---|
| Opaque product with a clear outline | Run automatic removal, then inspect the PNG | Shape, labels, handle openings, and contact shadow |
| Portrait with loose hair | Use the automatic result as a first pass | Missing strands and a hard edge against the final background |
| Glass, mesh, or translucent packaging | Expect manual masking or a new photograph | Background color retained inside transparent areas |
| Metal or glossy packaging | Preserve reflections that describe the material | A cutout that still looks reflective rather than flat |
| Several products for one catalog | Prepare consistent sources and compare them together | Scale, crop, lighting, and shadow treatment |
For products, decide which details belong to the item. A printed label, surface scratch, or color variation may be important to a buyer. Remove the surrounding scene without quietly changing the item's condition. If you are preparing a marketplace image, check that marketplace's current image requirements before choosing a background or adding graphics.
Run the browser workflow and keep both files
Open the tool, choose a JPG, PNG, or WebP file, and wait for processing. The first use may require model and processor downloads. The page displays progress and then an original preview beside the result. Large images and limited device memory can increase the wait; begin with one modest image when testing a new device.
- Save an unchanged source, such as
mug-original.png, in your project folder. - Select that file in Background Remover and wait for the result preview.
- Compare the complete outline, including small spaces inside a handle or between fingers.
- Download the PNG and name the working copy
mug-cutout.png. - Open the downloaded file in an image editor and test it on light, dark, and final backgrounds.
Processing the selected image locally does not mean that visiting the tool makes no network requests. The browser requests page assets and the model used for segmentation. Those requests are separate from the local operation on your selected photograph. Read the site's privacy policy when deciding whether the workflow fits your project.
A successful processing message means the tool produced an image. It does not establish that every edge is correct or that the result suits a particular publishing platform. If processing fails, try a smaller working copy and check that the original opens in a normal image viewer. Keep the source rather than replacing it with an unsuccessful export.
Inspect an actual example before judging quality
The example below uses a synthetic product illustration as a repeatable browser check. It is useful for seeing the preview and export workflow; it is a simpler input than a photograph with hair, glass, or a busy background. The screenshot records the tool's actual output, including any imperfections, rather than a manually perfected replacement.
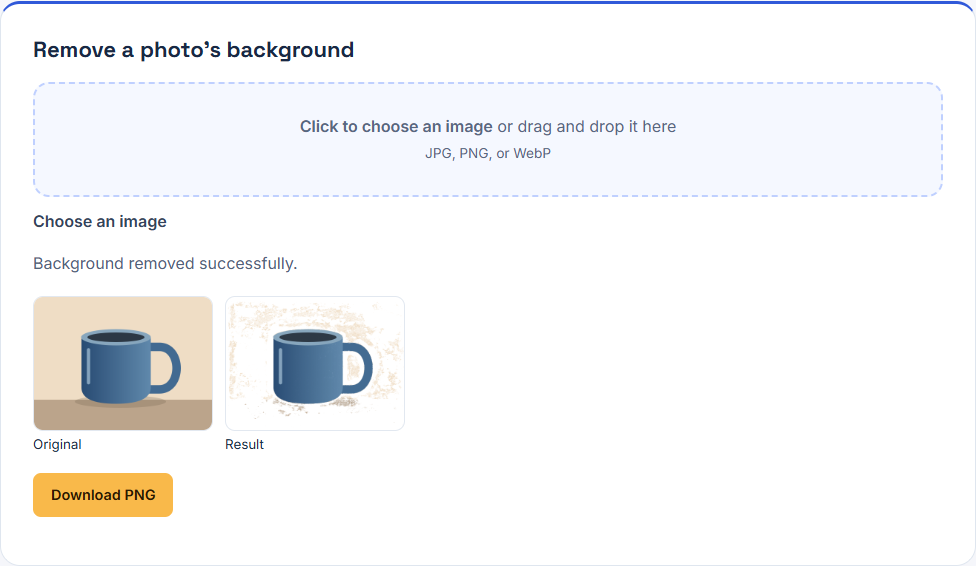
To repeat the check, download the synthetic mug input, run it through the tool, and inspect the handle opening and outer rim. Compare your downloaded output with the original. Results can differ across tool versions and devices; the screenshot is evidence for this sample only.

In this run, the mug's main outline survived, but large beige background areas remained above the rim and around the handle, together with smaller edge remnants. The exported PNG had both transparent and opaque pixels, but it was not a clean cutout and needed substantial manual cleanup. That is a concrete reason to inspect the image after a successful processing message. Download the recorded output to compare the remaining background with the source in your own editor.

For your own photograph, record three observations: whether the subject's shape survived, whether background fragments remain, and whether any needed shadow disappeared. That short record makes it easier to decide whether to accept the output, refine it elsewhere, or choose another source. Repeating the same automatic operation on an unchanged source is not a substitute for identifying the defect.
Check edges on three backgrounds
Place the PNG on white, a dark solid color, and the intended background in your editor. White reveals dark remnants; dark colors reveal pale fringes. The final background shows whether the cutout's lighting and edge softness fit the design. A checkerboard indicates transparency but does not replace these checks.
Inspect at normal display size first, then zoom to roughly 100 percent to examine important areas. Extreme zoom can make harmless antialiasing look alarming, while a tiny preview can hide a visible hole. Decide whether a defect matters at the size people will see. For a catalog batch, use the same viewing size and backgrounds for every product.
| Visible defect | What to examine | Practical response |
|---|---|---|
| Pale line around a dark subject | Color left from the original background | Refine the mask and edge color in an editor, or use a cleaner source |
| Missing handle, strap, or hair | Fine details mistaken for background | Restore from the original with a mask, or choose another photograph |
| Background inside a handle | A small opening missed by segmentation | Remove the remaining area with a mask while preserving the rim |
| Product seems to float | Missing contact shadow or inconsistent lighting | Add an appropriate shadow in the composition editor |
| Jagged outline at the final size | Low-resolution source or an overly hard edge | Start from a larger source and refine before resizing |
Check the whole subject as well as its perimeter. Automatic removal can leave a transparent hole in a pale shirt or remove a highlight from a reflective product. If your editor displays an alpha channel or mask, inspect it alongside the color image. The Anvil browser interface does not provide that editing view, so use a separate editor when the result needs repair.
Handle hair, glass, reflections, and shadows deliberately
Hair and fur contain many soft, partly transparent edges. A fully opaque outline can look like a helmet; erasing every faint strand can make the subject look clipped. Keep the original available while refining in an editor with a mask. Preserve the dominant shape and visible strands at the final size instead of trying to paint every detail independently.
Glass is harder because the old background can remain visible through the object. Removing the pixels around a bottle does not replace the color seen through it. Likewise, mesh and translucent wrapping may need different opacity inside and outside the outline. If accurate material appearance matters, use a manual workflow or photograph the product on a background closer to the intended one.
Reflections help a metal or glossy object read as that material. Removing every bright region can make it appear matte, while leaving a strong reflection of the old room can make the new composition look implausible. Make the choice against the final background. Keep identifying product details intact, and avoid describing a heavily reconstructed image as an unchanged product photograph.
Separate the cast shadow from the object itself. Automatic removal may discard a shadow that made a shoe or mug feel grounded. A replacement shadow should follow the composition's light direction and fade naturally away from the contact point. Do that work in a layer editor; this browser tool does not generate a controlled studio shadow or supply lighting controls.
Export for the destination and compare a batch
The downloaded PNG supports transparency. A JPEG export does not preserve an alpha channel, so flatten onto the intended background before using JPEG. Keep a transparent master when the same cutout will be reused on several backgrounds. Save the flattened destination image separately so a later layout change does not require starting from the source again.
For a group of product images, compare them in one contact sheet or page layout. Align their apparent scale and ground line, check crop margins, and use consistent background and shadow treatment. Do not force objects with very different proportions into identical crops if that hides their shape. Consistency should make comparison easier for the viewer.
A simple handoff can contain source/, cutouts/, and exports/ folders. Include the intended dimensions and background color in a short note. If a cutout needs manual repair, identify the area explicitly, such as 'handle opening retains background' or 'left sleeve has a pale fringe.' A specific note helps the next editor more than 'make it look better.'
Finish with the downloaded file
Open the export independently of the tool preview. Check that it has the expected dimensions, the complete subject is present, and transparency survives in an application that supports it. Place it in the final website, slide, or design and inspect that placement at its actual size. A good standalone cutout can still look wrong after cropping, scaling, or changing the background.
Accept the result when it preserves the subject and works in its destination. Use a layer editor when the defects are localized and recoverable. Choose another source when the outline is ambiguous, the image is blurred, or transparent material requires extensive reconstruction. These decisions save time and produce a more dependable asset than treating every automatic output as finished.
Check a licensed product photograph
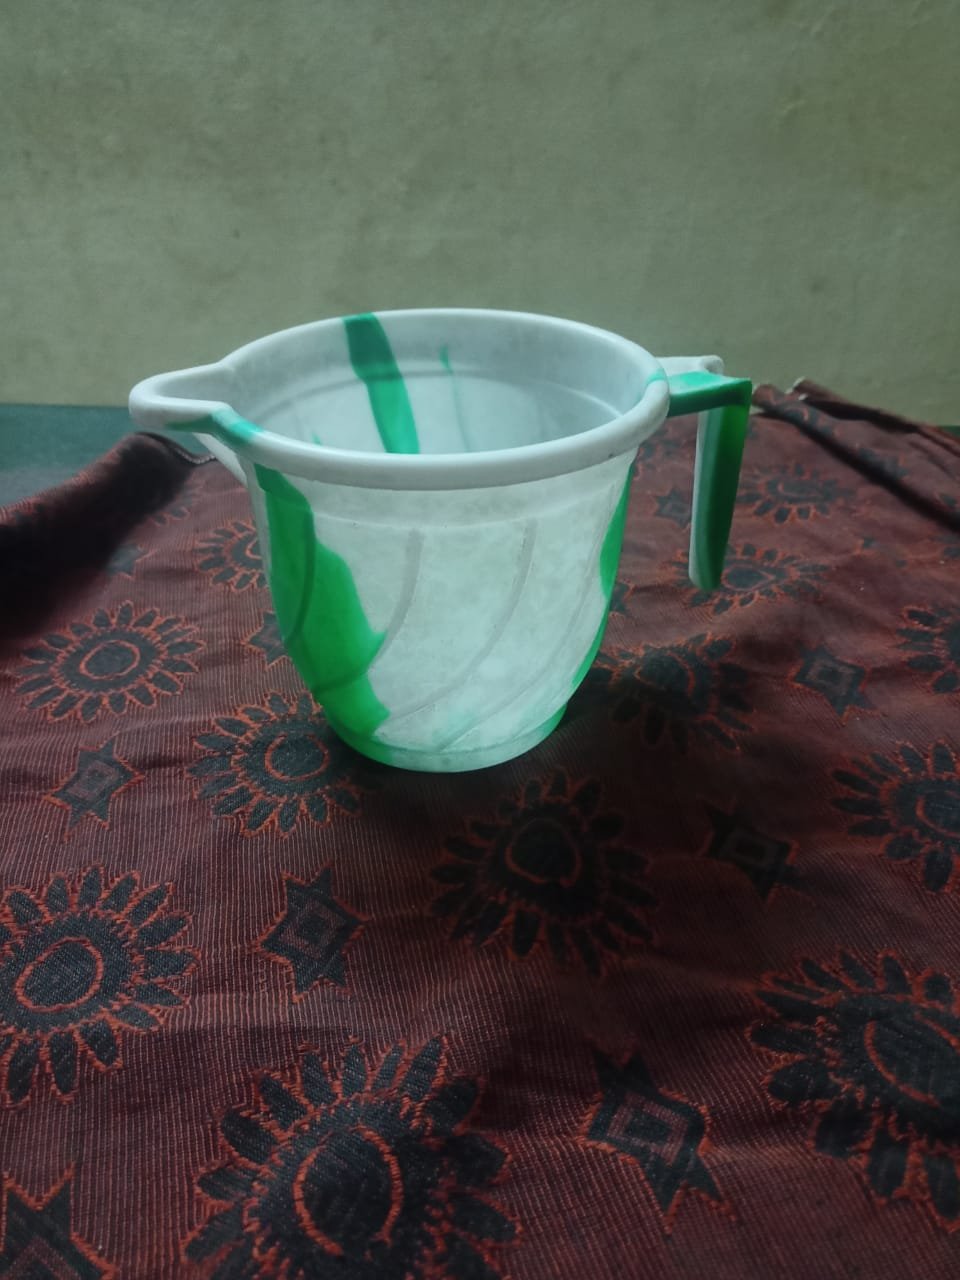
The second check uses a product photograph of a cup on patterned fabric, with its handle against the surrounding cloth. Mug image.jpg by Mohanraj55 is released under CC0 1.0. The following previews are resized for this page; the downloadable source and model result retain the full 960 × 1280 dimensions. No manual cutout or retouch was used.

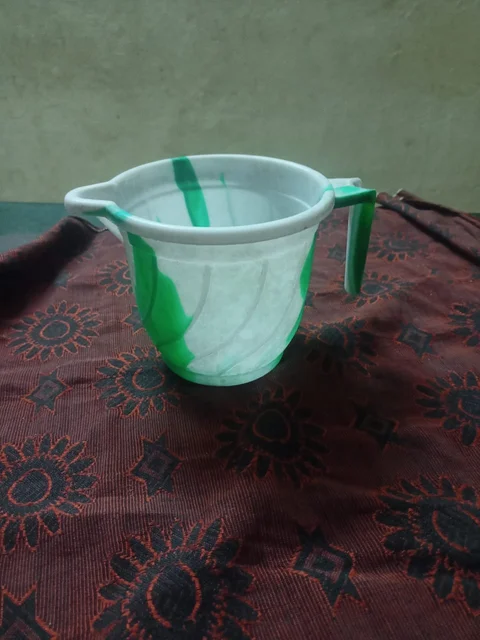
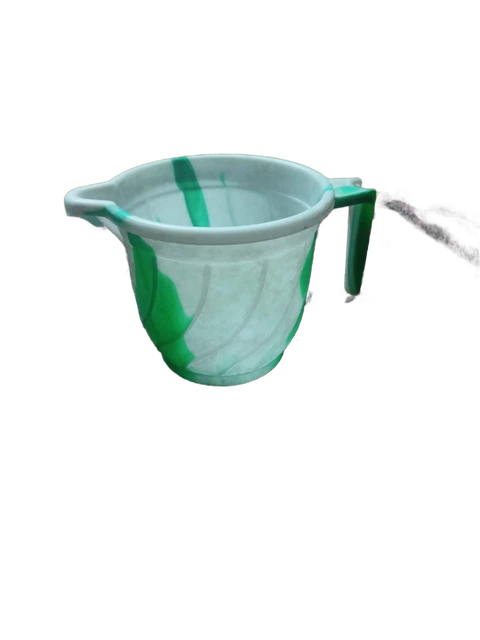
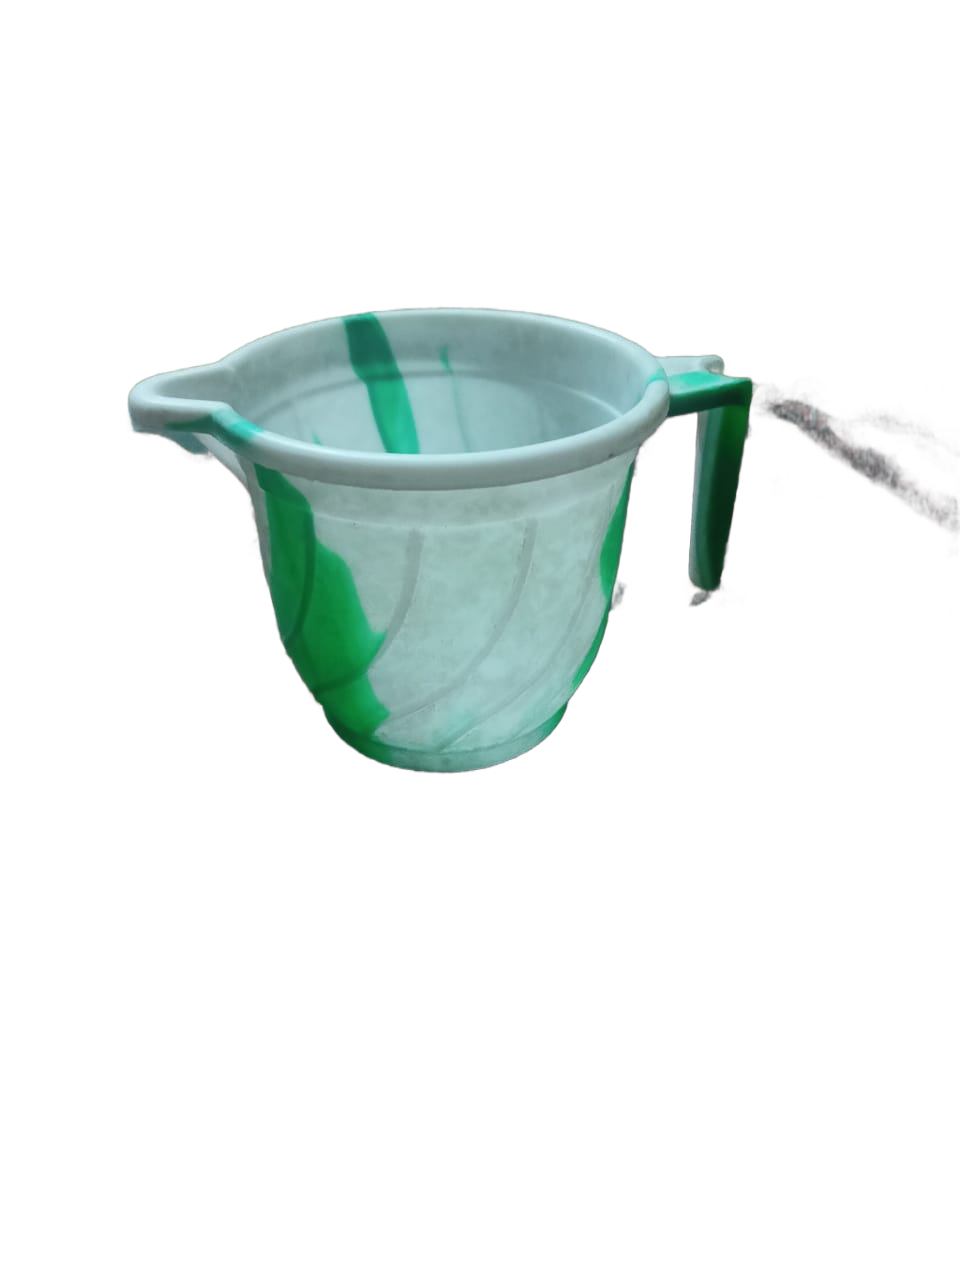
In the recorded Chrome desktop run at an emulated 390-pixel touch viewport, first processing took 34.4 seconds; measured first-party model/runtime resource bodies totaled 52.4 MiB. This is one desktop lab run, not a phone CPU or general speed guarantee. The cup outline and green handle remain. Most wall and cloth pixels become transparent, but a large fabric fragment extends from the handle to the right edge; small background remnants remain below the handle and along the cup edge. This output needs manual cleanup.
Download the original photograph, inspect the actual transparent PNG, and read the source and license record. Check the handle opening, right edge, and any background fragments on both light and dark surfaces before using the result. A successful export confirms processing; it does not establish a finished product cutout.